|
07-16-2005
 posted by
Cutter
posted by
Cutter
This old oak cabinet is one of my prized possessions, for several reasons.
For one thing, it does come in real handy. It was built by the kids in the
woodworking class at Monterey High School many years ago, to be used in
the drafting class for their tool storage. I had a couple of buddies that
contracted to do the tearout when the school remodeled in about 1980. They
saved this cabinet & sold it to me for $25. It is about 6 feet tall & 3
feet wide. It must weigh 400 lbs with all the junk I have in it. The
drawers - 45 of them - are all solid oak too & only one of them needs
repair; some of the dovetails are broken so I keep it on the bottom right
hand corner for now, maybe forever or until I feel inclined to fix it.
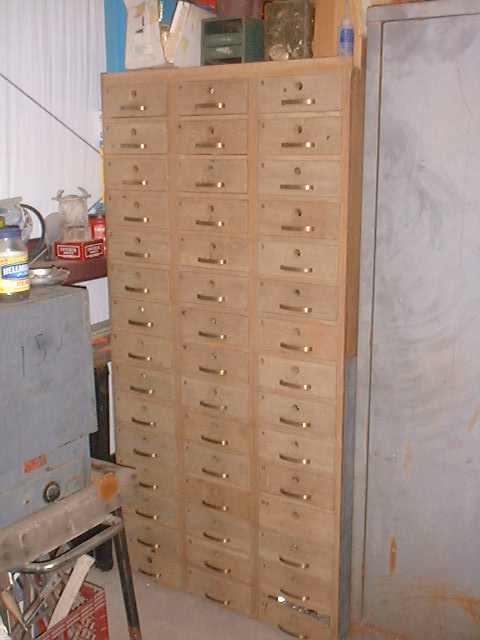
If you look close enough, you might can tell that there is a hole in the
front of each drawer. There was a brass, double throw Corbin lock in each
of them & about a third of them were locked when I got the cabinet; I had
to take the back off the cabinet and remove the locks from the inside,
took me all night. Several years later, I had a master key made; jeez, I
could have saved myself a lot of hassel if I had thought of that then.
duhh! But I still have 20 or 30 of them, turns out they cost around 12
bucks apiece.
Each drawer is about 9 inches wide, 2 3/4 inches deep & 14 inches long.
inside.
__________________
cutter
07-16-2005
posted by
Cutter
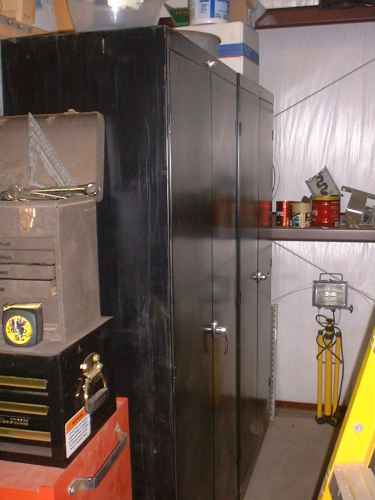
This ugly old gray metal cabinet was a freebie from a garage sale several
years ago. It is homely but it holds a lot of stuff. 6 feet tall, 18
inches deep & 32 inches wide. It also is good to stack things on.

And as luck would have, I also have a pair of black ones, considerably
newer, that I bought from my old shop landlord when he moved back to
Indiana a few years ago. One of them is 36 inches wide, the other is 32
inches wide, so their total width is the same as the gray cabinet combined
with the oak cabinet. I put these black ones back to back with the gray &
oak one, facing the open shelving in the corner. That compacts my little
storage corner about as well as I could figger how to do it. The open
shelves are starting to fill up but so far, the black cabinets are nearly
empty. But that's just because I haven't been industrious enough to finish
putting things away. Well, there is another reason, too; every time I put
a pile of stuff up where I can find it easily, I spend half of the next
day hunting for it.
__________________
cutter
07-16-2005
posted by
Cutter
Beginning to put things up
But it is a never-ending process.
It was all a heck of a mess last month on moving day & for several days
thereafter, but little by little, things have begun to get better. So then
I bring another load home to mess things up so it will feel more normal.
But I keep rearranging stuff & hiding it from myself. My kids are going to
have such a fun estate sale someday. No hurry, though.

I knew before I built the little building that it would be too small but
as you may remember, I used all of the available area I could for it & had
to beg the zoning board for a variance to do it at all. So my choices were
to sell this property & move, do nothing or make do with what I have, I
still think I did the right thing. This is after all, a hobby shop. I am
not trying to embark on a new career or start a business out of my back
yard. This is just my little playhouse and if you don't realize that I am
having fun out here, then you just haven't been listening.
Oh, did I tell ya'll about the little kids that kept coming by last
winter, hanging around & talking to me through the fence? There were
several little boys & girls on foot, skateboards & bicycles & some of them
would show up everyday asking if they could pet my dogs or just generally
chattering at me, asking all kinds of questions. One chubby, happy little
girl finally asked for the tenth time, "What's this place going to be?" I
told her once more that it was just my workshop, toy box or something. She
said, "Well, we heard it was going to be an ice cream store!"
I truly love my little cuttershop.
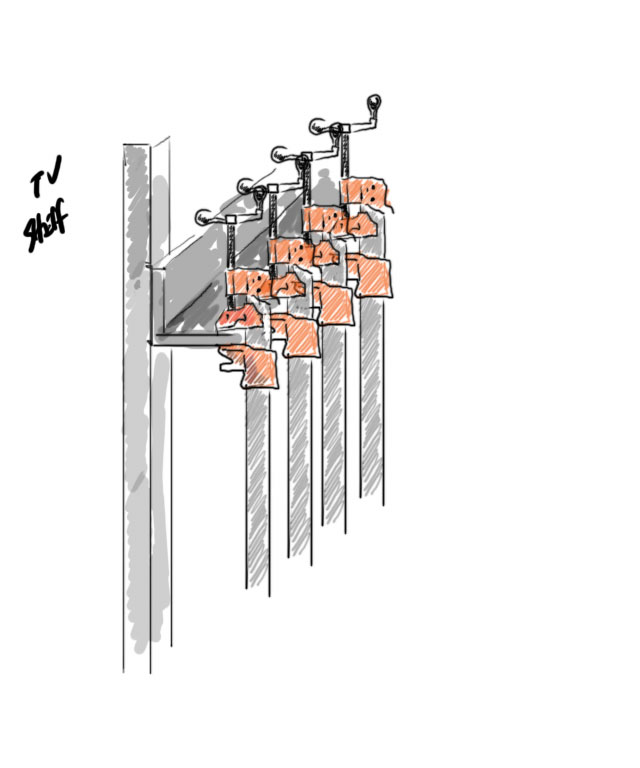
One silly problem I just haven't been able to resolve is storage for these
danged old clamps. They are either too long or too heavy or just too
clumsy or something for me to have found a place for them but I need to
hang onto them. Here's just a few of them.
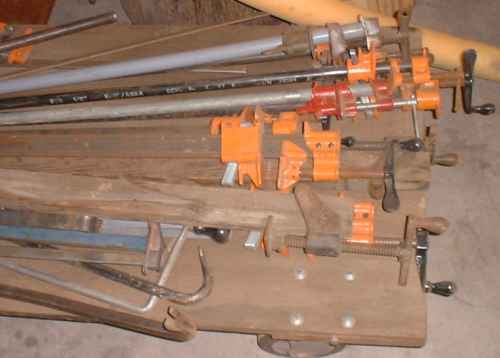
So they have continued to be in my way, just laying there on that dolly. I
have thought I'd rig up a horizontal bar mounted to one of the purlins to
clamp them to, but the purlins are not very strong; looks to me like they
are really just there to hold the sheetmetal onto the building. I thought
about attaching something to one of the a-frame hoist legs but you know,
I'm not too sure I'm going to keep it anyway. I think it was a mistake
because it takes up so much room & I don't expect to use it enough to
justify it. It's kinda like having a fat cousin sitting around all the
time; she might be a nice gal & all that but you just really don't get all
that much good out of her. Oh well, I did have fun building the hoist.
I guess I better make that a project for this afternoon; I am sick of
walking around that mess of junk on the floor.
__________________
cutter
07-16-2005
posted by
Cutter
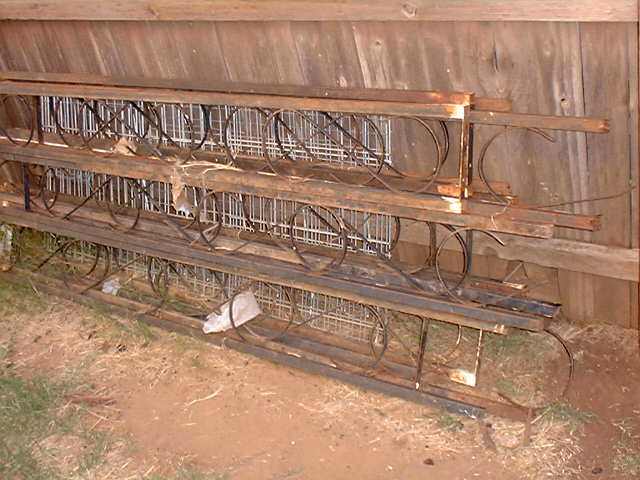
One woman's trash
can be a man's treasure, and I can think of several fun variations on that
line.
But my neighbor Cassie heard me say something about scrap iron one day &
asked me if I wanted this pile of junk in her back yard. Turned out to be
piled against the fence I have shared with her for 13 years. There were 2
or 3 wire pet cages and about 20 of these porch supports, very thin-walled
1 inch tubing & lots of rust but I could see a use for them so I tossed
them over the fence & there they stayed until about a month ago. This
picture was taken after I had already dismantled about half of them.
So I spent too many hours grinding these things apart & then cleaning them
up. Cutting them apart was easy, brushing & sanding off the rust was
godawful tiresome.
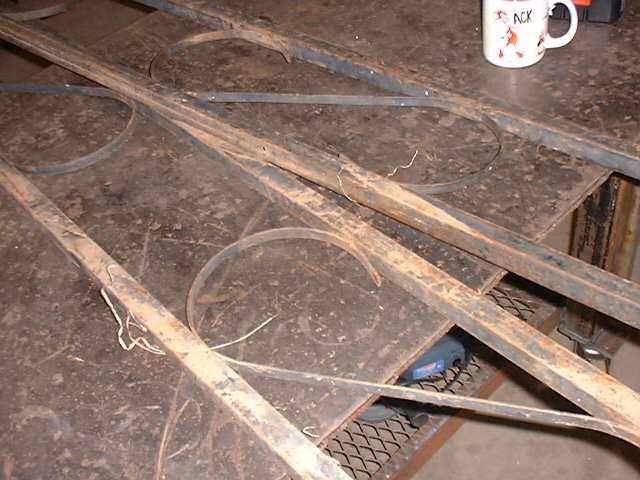
But I got enough of it cleaned up, cut off the rusted ends where the had
spent too many years in the dirt & proceeded on with a little gate
project.
__________________
cutter
07-16-2005
posted by
Cutter
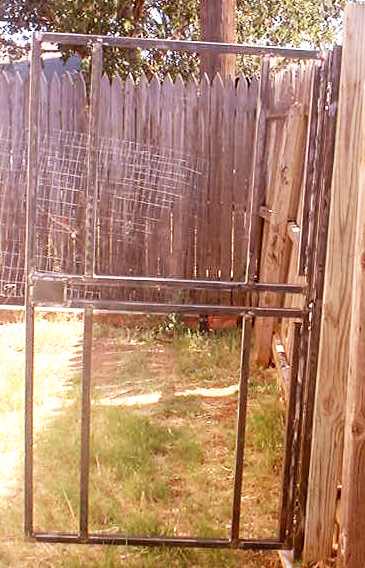
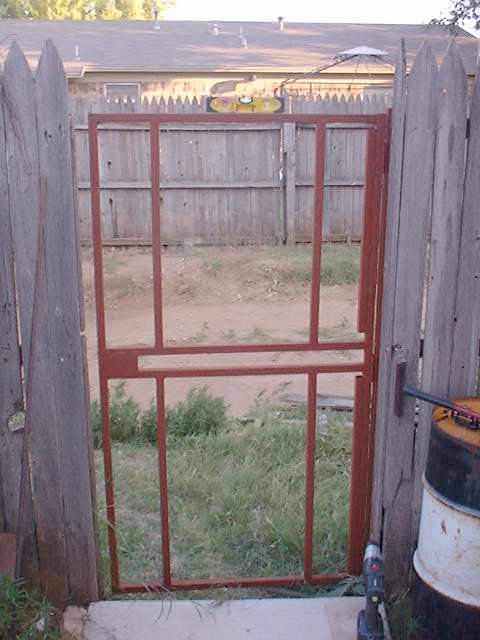
gates
Not that I really needed new gates or anything. This is the old back gate
out beside my shop & it is the one I go out to haul the trash to the
dumpster. I was mighty tired of watching it fall apart every time I
wrestled it open & each time threatened to be the last. But you know,
priorities & all that.
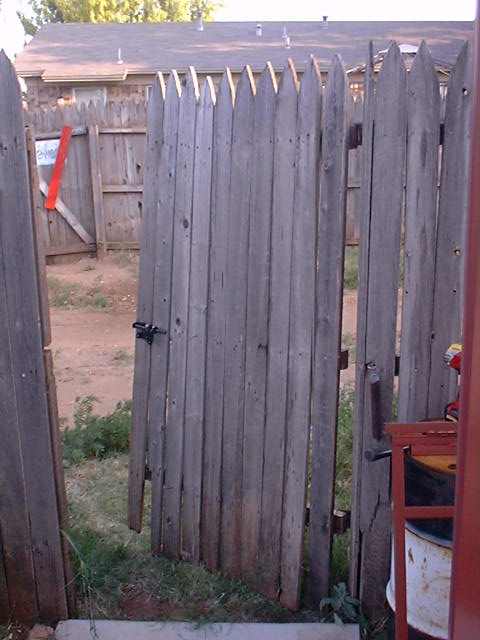
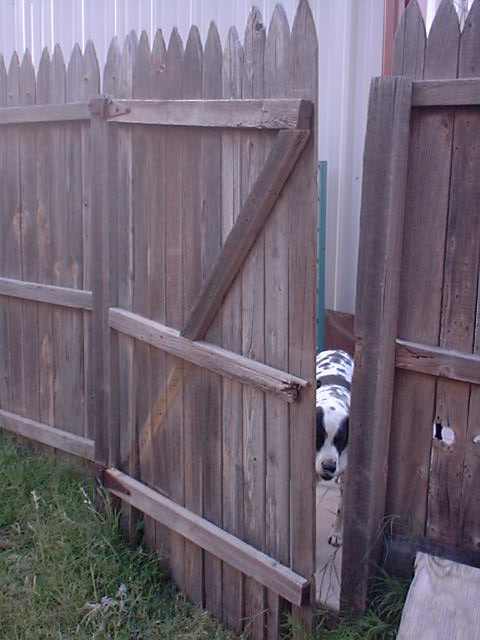
The first picture probably illustrated well enough that I needed a new
gate but Dottie was kind enough to pose for this picture & I don't want
hurt her feelings.
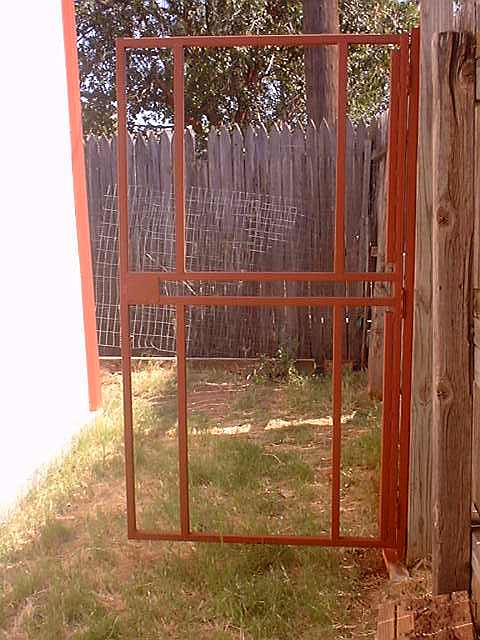
So, I proceeded to get me a lesson in welding thin walled tubing. This
stuff turned out to be 18 guage, according to the little wheel I bought
last year. And it can be real finicky. I finally gave up on the MM 251 &
switched to bottle over to the little Hobart. Actually, I could turn the
251 down far enough but the lighter torch & smaller nozzle of the 135 just
seemed to help me lay the beads in the corners easier. But for me, this
was a purty educational trip. I am surprised at how few pictures I saved
of this project but I finally got it ready to take to the "paint
department" & hung 'er up for some primer.
__________________
cutter
07-16-2005
posted by
Cutter
for 7018
Yes, I did say paint. But before we get to that, I want to explain a
couple of things about these gates. I have done several similar
residential gates in the past & used to braze them together; I have
decided that light weight is more important than wall thickness & a frame
built out of 14 or 16 gauge is about as good as it gets for these
purposes. And this time, I have even lighter material, 18 gauge but it
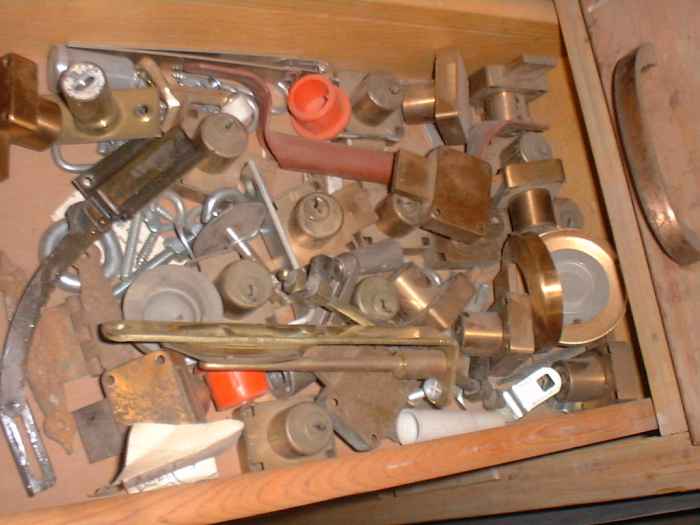
seems to bear up ok. So I always just use residential door hinges like
this:
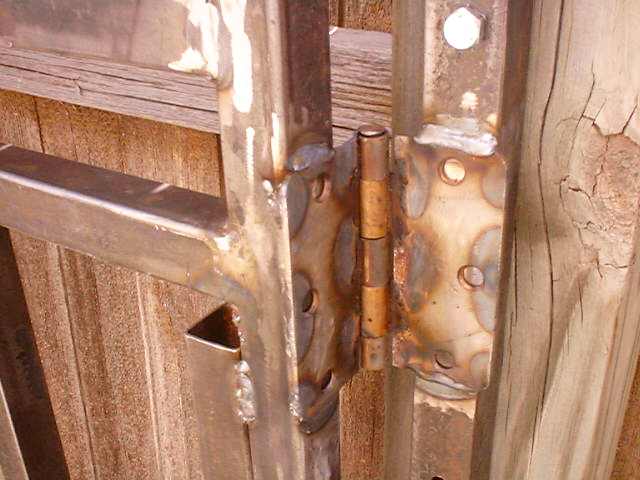
You can't really tell, but I did grind the brass off the margins before
welding them on. This frame might weigh 25 pounds & these hinges are a
heck of a lot better than those galvanized strap hinges you usually see on
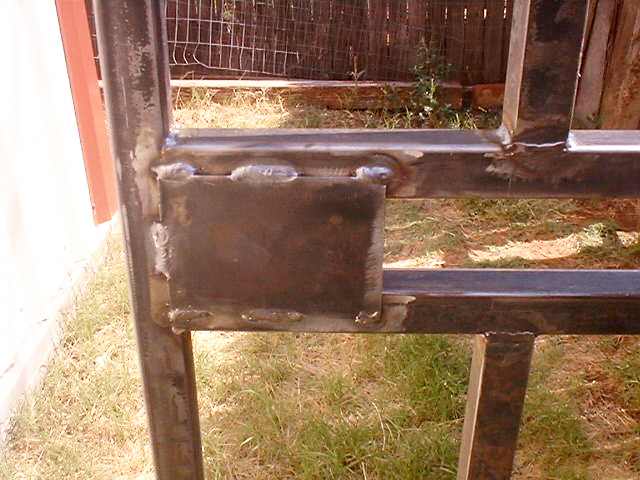
wooden gates. Then I stuck a latch plate on the other side, for the latch
bolt that I saved from the old gate.
And then, glory be - I spent maybe 10 minutes with some rattle-can Krylon
primer, 'cause that's what I found in the garage.
__________________
cutter
07-16-2005
posted by
Cutter
So I let it dry a few minutes, that doesn't take long in the summertime
around these parts, then took the old gate down & hung the frame with 2
1/2 inch lag bolts.
I use 1 inch black drywall screws & 7/16ths pilot holes to attach the
pickets to the frame. I intended all along to use sheet metal for this
gate, to match the building, but when it got right down to it, the gate
opening was just not right for it because I would have to cut the
corrugations off each side of the panel & then the trim wouldn't fit. So I
re-used the old cedar. Heck, it's a lot cheaper that way anyhow.
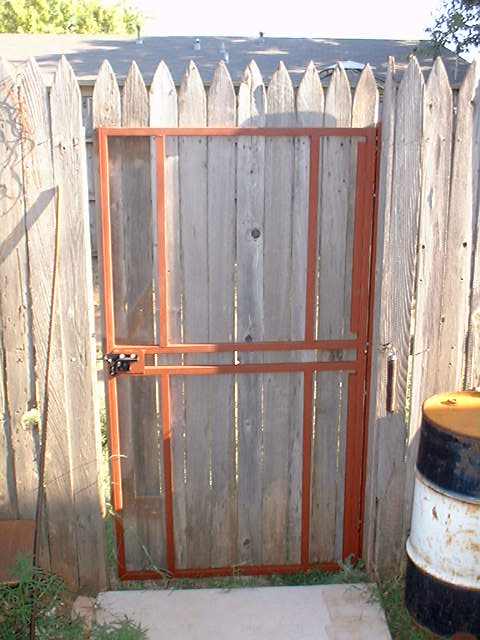
So there she blows, now I can take my trash out without fighting the
fell-apart old gate. I do still need to install a stop bar on the left
side, on the latch post. I have already built & installed the side gate on
the west side of my house. It went much faster than this one.
__________________
cutter
07-16-2005
posted by Broccoli1
Hey Cutter,
waht about using the sides of your TV shelf for the bar clamps. Mount a
piece of angle-at least to get then out of the way for now.

__________________
Ed Conley
" Of all the Charlie Browns in the world, you are the Charlie Browniest."
Linus Van Pelt
07-16-2005
posted by Broccoli1
I'm bored here at my office waiting for some equipment to return off a job
so I'm just playing with my computer.
__________________
Ed Conley
" Of all the Charlie Browns in the world, you are the Charlie Browniest."
Linus Van Pelt
07-16-2005
posted by
Cutter
Well hell, Ed.
Why didn't I post that problem sooner? That's far & away a better idea
than I've come up with. Quicker,too.
__________________
cutter
07-16-2005
posted by 7018
Thanks for the post about the paint!!!!!I just figured you hated paint,Now
the only other thing I can say is it would look better with some Black
over the primer!!!!!
07-16-2005
posted by Tom Zachman
Nice pichures Cutter. Broccoli's i-d-ah has one flaw; lookin at them
clamps creates more i-d-ah's in yer head. NOT GOOD! Hide 'em. You'll give
thansk when I deliver yer skyhook.
btw, last week fell apart on me and I didn't get to visit with the drayage
people.
__________________
Chief Potentate of Diddly Squat
You got questions? SFT's got answers! Sometimes even the right ones. Dumb
looks are always free.
07-17-2005
posted by
Cutter
Quote:
Originally Posted by 7018
the only other thing I can say is it would look better with some Black
over the primer!!!!!
Would not. Not with those crappy old pickets on there. Now it might look
better if I had a wife telling me what to think but as the primer fades,
it will blend with the wood & all of it will look nice & old. You know -
vintage.
__________________
cutter
07-17-2005
posted by
Cutter
Quote:
Originally Posted by Tom Zachman
btw, last week fell apart on me and I didn't get to visit with the drayage
people.
thanks, Tom. Not to worry.
__________________
cutter
07-17-2005, 12:32 AM
posted by Franz
Quote:
Originally Posted by cutter
Would not. Not with those crappy old pickets on there. Now it might look
better if I had a wife telling me what to think but as the primer fades,
it will blend with the wood & all of it will look nice & old. You know -
vintage.
With a little effort, you could have worked rustic and patina into that.
07-17-2005
posted by storts
To Cutter
Quote:
Originally Posted by cutter
Ummm, could you please?
Franz, I admit that I'm in over my head dealing with this guy and with the
whole issue of 3phase. But Warren said they would have to install 2 240
volt transformers on the pole just outside my fence. I told him you said
something about an available mini substation & I could see that that gave
him a pause, but he chuckled & said something about "No, you don't need to
go quite that far." If I understood him correctly, that is 480 volts
runnung down the alley.
I did leave the options open & he said to call if he could be any help.
By the way, what is a mini-substation?
From there, I dropped by Southwestern Electric supply to price out the
service equipment. The city &/or the provider are now requiring a
disconnect mounted with the meter base and the meter base must also have a
built-in bypass. Then the indoor breaker box has to have a main breaker in
either 200 amp single phase or 100 amp 3phase. This starts getting pricey
in a hurry for either service. For single phase, 200 amps I am looking at
about $550, including tax & for 3phase about $925 plus the cost of the
transformers.
Any advice about saving money would be most welcome, from any of you. At
the rate this is going, I may be looking at going with a 100 amp service
just to get out of this alive.
Wish I knew you back ten, and what a aprope time to put the shop build
back on( bet you a coffee or six pack when you saw aprope,you said holy
jumpin tying machins Batman) I have 3 220 3 phase main disconects,,in
stock from the old building, my ex partner in the Building ONLY!!!!!
ordered them because HIS electrican friend said we need them ,Notheast
utilities will be out this week on my shop,,,built this entire house, and
they were the only people I had trouble with,,ask Franz about there
reputation Thanks for the great timing).Jack
07-17-2005
posted by storts
Sir and Franz
Quote:
Originally Posted by Sirarcalot
No way, Franz. I like Cutter.
Agreed ,,In one of my other replys,Imus had Booby V on, And called him a
Idiot with a Hammer, Thanks God that he Has Norm!!!!,Jack
07-17-2005
posted by storts
To Jake
Quote:
Originally Posted by Jake
I have my Garage/workshop floor coated with an inductrial Epoxy. It is the
same stuff they use at Boeing. IN my former life, I layed that stuff down
for a living, It holds up to my welding slag really well, But Sealing,
(with a high quality sealer, not that cheap crap,) is a great way to go as
well. I can tell you this, a dropped part is alot easier to see on my
battleship grey floor, than on concrete.
Jake, Im in the process of putting up my own shop, and Money will be
tight, But I worked in a dungen for 28 years,,and have heard alot of good
thing about the 2 part epoxy,,and have used it many times on tanks that
Ive built,
So whats your proffecianal opion on the expensive 2 part epoxy,,,Im
covering approx 1600 sq. feet, Thanks,Jack
07-17-2005
posted by storts
To Franz
Quote:
Originally Posted by Franz
Damn Cutter, you bring back fond memorys of pay toilets back before they
were outlawed here.
I can see it in my mind, Cutter standing by a table with a stack of warm
towels and supplys, in a white jacket, next to a tin plate full of coins.
Who knows, he may even work his way up to a coast to coast chain of pay
toilets. Find a need and fill it, the key to success in American business.
Is that the Oh Boy(showing my age) Here I sit Broken harted, Paid a dime
and only farted??????????
Remind me to tell you the Job we had to do at the J.C. Pennys store In the
Meriden Square,When they were still there,,I think Its a Lord and Taylor.,
or Filenes Now,,Its a Pisser, Pun Intended,,It was a mens room Job,,, One
of the ones you never forget,,Jack
07-17-2005
posted by storts
The Best
Quote:
Originally Posted by Franz
Cutter, I don't know what yer complainin about, I did offer you the use of
the walk behind trencher.
Don't forget, before you close the trench to install the RG59 for the
cable TV to the shop, and the spare for the CCTV security camera. Hell,
while yer at it, you might oughta add a 2" conduit for stuff you'll want
out there in the future.
When building my house,,colonial, with streess skin panels, and a timber
frame,,you have to do alot of planning
!!!!!!!!!!!!!!!!!!!!!!!!!!!!!!!!!!!!!!!!!!!!!!!!!!
!!!!!!!!!!!!!!!!!!!!!!!!!!,,,3 pcs of 2" pipe,,"Just in case" Never
know,,,Jack
[Home] [1] [2] [3] [4] [5] [6] [7] [8] [9] [10] [11] [12]
 |
